From Idea to App - How to set up a monorepo

Setting Up the Codebase While Designs Are Finalised
As designs are being completed, the development team can prepare the codebase to ensure a smooth start to feature development.
Why This Matters
A solid foundation makes development easier and more efficient. Since early stages often come with uncertainties, the codebase needs to be flexible enough to adapt as requirements evolve.
What We Know So Far:
- The platform will be web-based.
- The application will run in the cloud, requiring servers and databases.
What We’re Aiming For:
- A maintainable and scalable codebase.
- Alignment with industry standards.
- Reliable frameworks to support development.
- A frontend structure ready for incoming designs.
Tech Stack
Programming Language
We're using TypeScript/JavaScript, a strong choice thanks to its flexibility, rich ecosystem, and support for both frontend and backend development.
Codebase Structure
A monorepo will help manage multiple packages efficiently in a single repository. This setup ensures consistency, simplifies dependency management, and improves collaboration.
Core Technologies
- Language: TypeScript
- Testing: Vitest
- Code Quality: ESLint, Prettier
- Source Control: GitHub
- CI/CD: GitHub Actions
- Monorepo Management: Turborepo
- Version Control: Changesets
- Package Manager: pnpm
Frontend Stack
- Framework: React
- Bundler: Vite
- Styling: TailwindCSS
- State Management: Zustand
- Routing: Wouter
- Internationalisation: i18n
- GraphQL API Requests: Apollo Client
- REST API Requests: react-query
- Validation: Zod
- Form Management: react-hook-form
- Component Development: Storybook
What Needs to Be Done
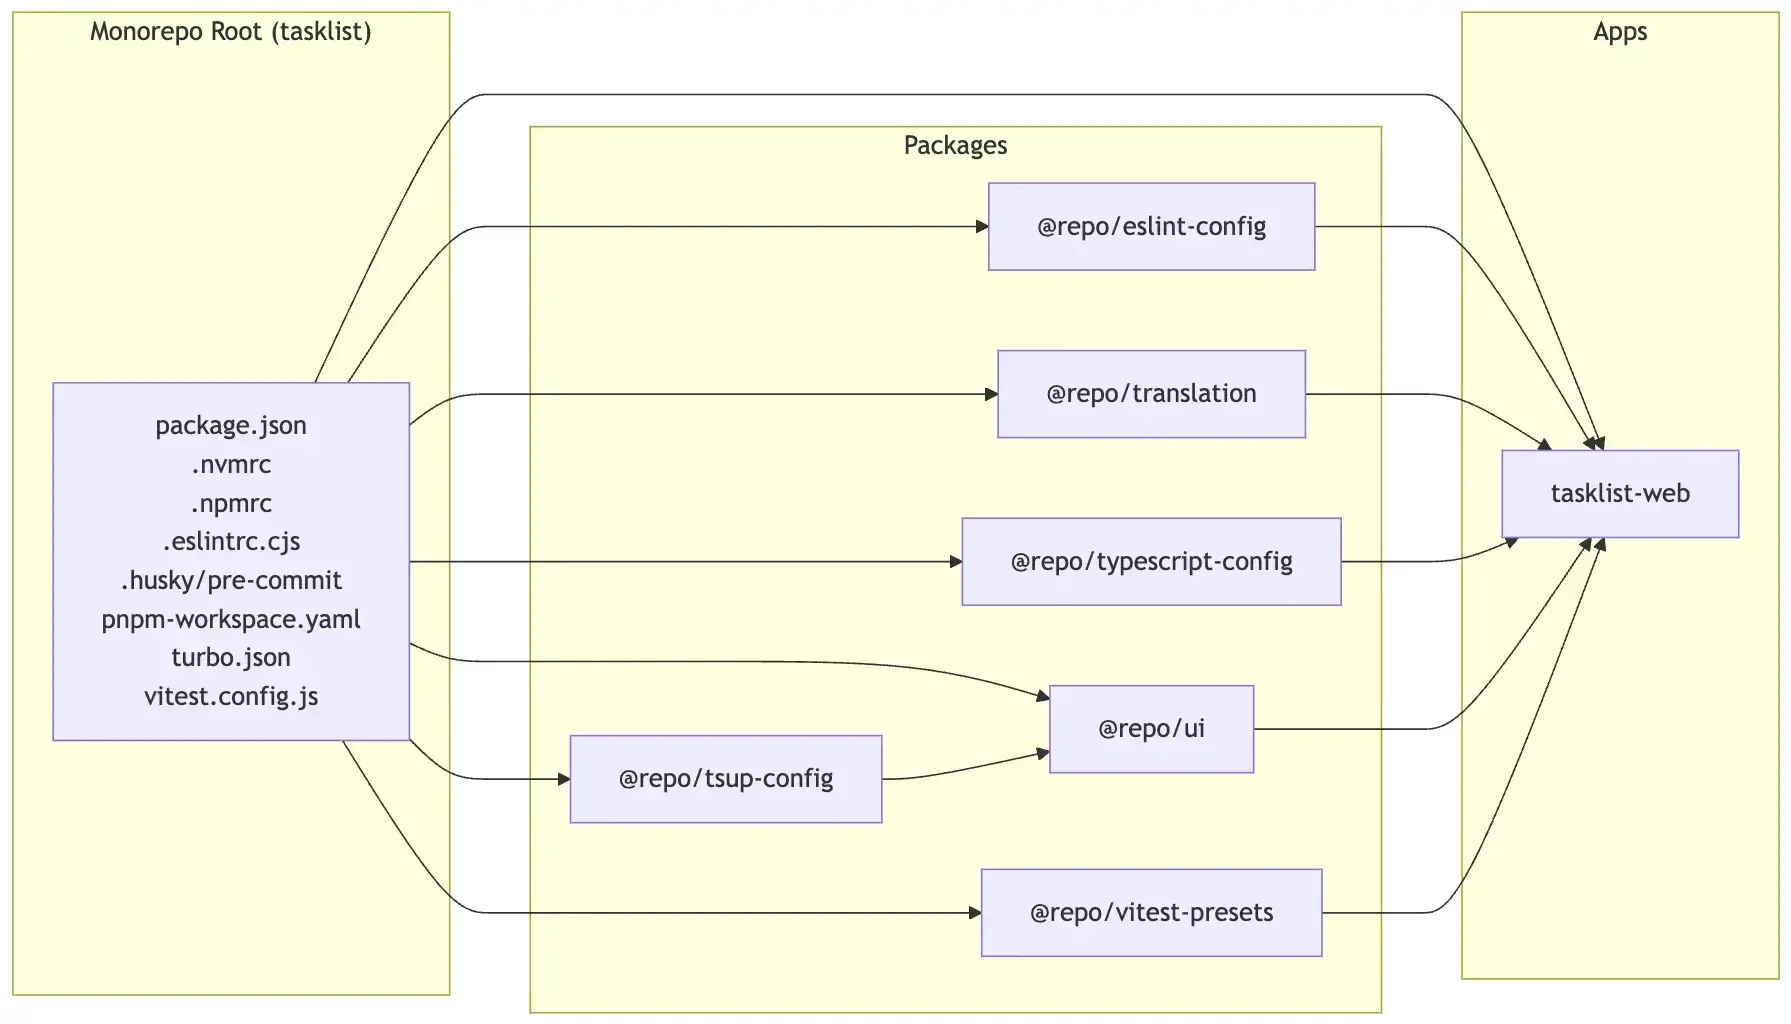
Monorepo Setup
Getting Started
- Create a repository (GitHub link)
- Set up pnpm as the package manager
- Configure Turborepo for monorepo management
Development Tools
- Configure TypeScript in
@repo/typescript-config - Set up ESLint and Prettier for consistent formatting
- Add Husky for git hooks
- Set up Vitest for testing
Setting Up Translations
Getting translations in place from the start has several benefits:
- Saves time later by avoiding refactoring.
- Keeps content clean and organised.
- Makes it easier to update text across the app.
- Supports multilingual functionality.
- Lays the groundwork for future CMS integration.
Translation package is now set up in @repo/translation with mock content. View changes on GitHub
tsup Configuration
To convert TypeScript into JavaScript modules, we’ve configured tsup for different environments in @repo/tsup-config.
UI Library Setup
The UI library will include reusable components like buttons, inputs, and typography, along with theming for colours, spacing, and fonts. TailwindCSS will handle styling, Storybook will help with component previews, and Vitest will cover testing.
Initial setup includes:
@repo/vitest-presets@repo/ui- Configuration updates for browser environments.
React App Setup
The tasklist application is being built with:
- Vite for fast builds.
- i18n for internationalisation.
- Wouter for lightweight routing.
- Zustand for state management.
- Vitest for testing.
- Storybook for component previews.
Documentation
README files have been added to each package, explaining their purpose, commands, and usage guidelines.
Final code
The final state of the code for initialising the monorepo can be found here: GitHub link
Keeping Track of Progress
ClickUp Board
Tasks and subtasks for this setup are listed on our ClickUp board.
Wiki
All key project documentation is available in our ClickUp wiki.
Next Steps
In the meantime, the app wireframes are completed (see previous post), user stories to implement features are underway, and we are synchronously implementing the design system with theme and components as they come from the design team.
After the design components are implemented, we can synchronously work together with the design team on the user stories:
- Task
- List of tasks
- Add task
- Complete task
- Edit task name
- Delete task
For preparation of the upcoming work, we will set up a "local database" with basic actions, imitating an API to make the components interactive. Also, to be able to work on the independent stories in parallel, we will initialise the components so dependencies don't block each other (like how creating the task list component is depending on the task component).
Here's how our timeline look like now: