From Idea to App - Authentication Screens Design
Now that the main screens of the app are complete, and enough to gather feedback upon, we will continue designing the Task LIst app with authentication screens:
- Sign in
- Sign up
- Set password
- Reset password
- Log out
You can see the tickets for this post in this ClickUp board
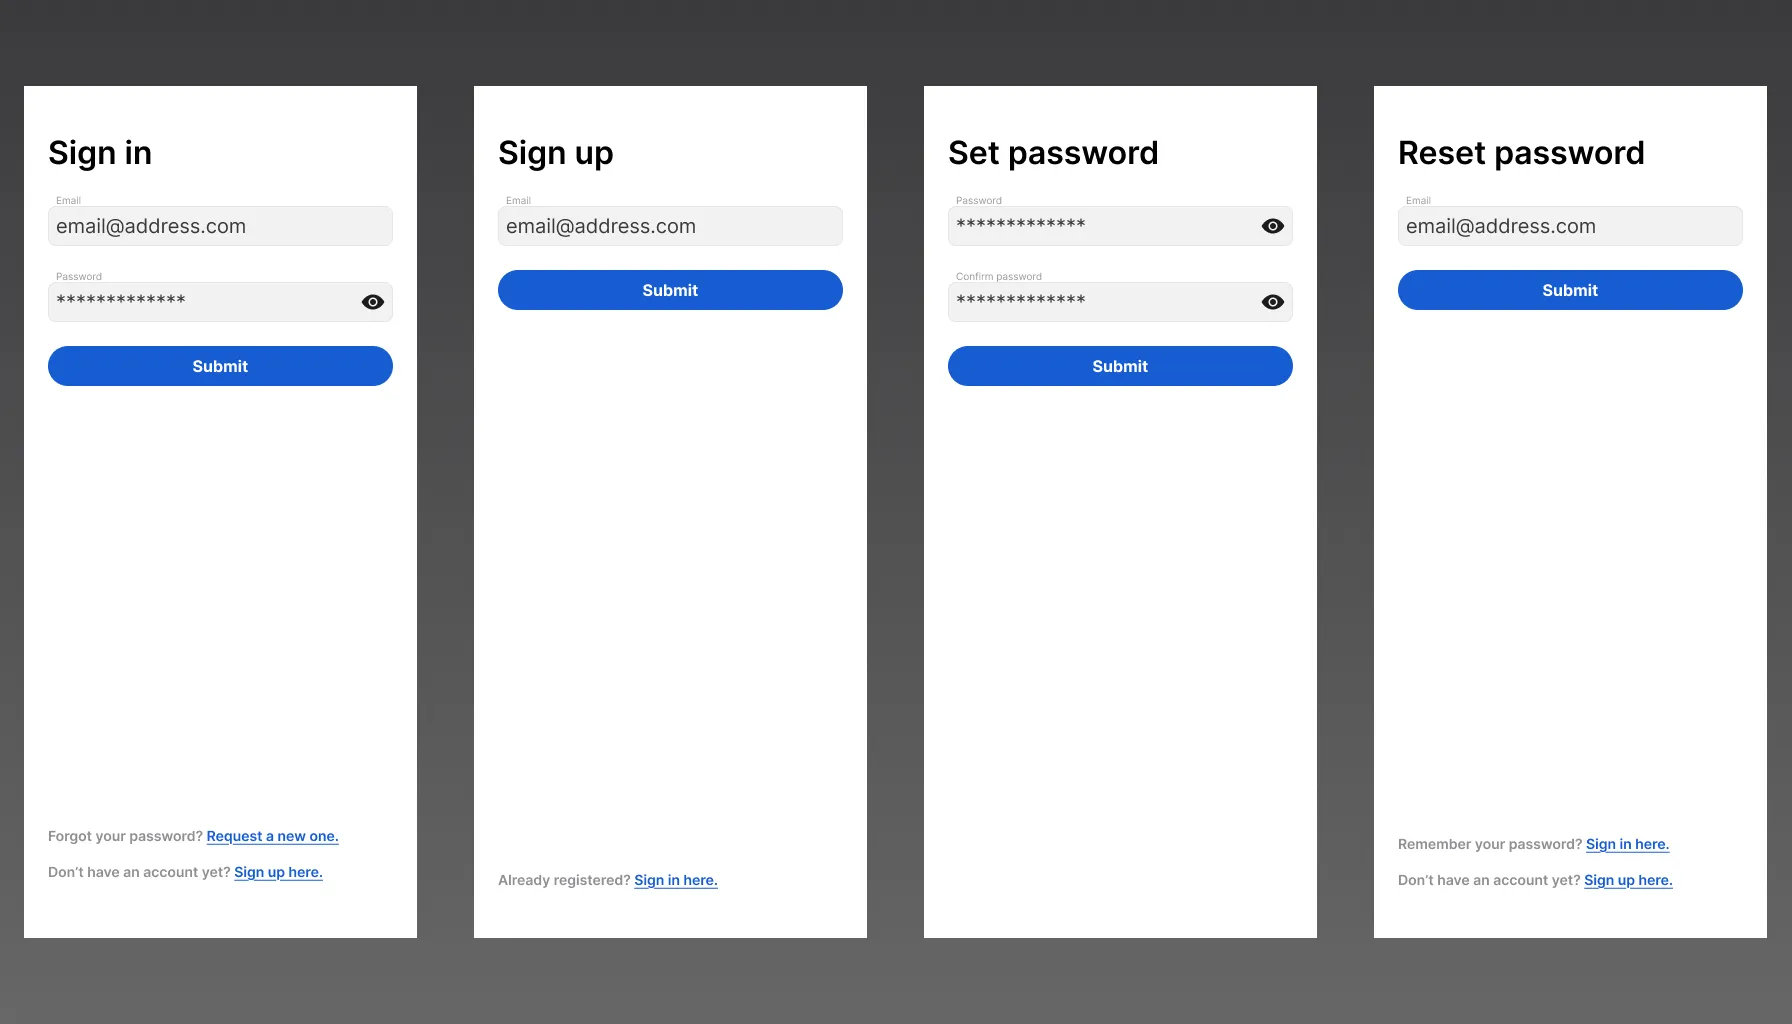
Screen layout
We aimed to create uniform screen layouts for the authentication screens with the following elements:
- Title – at the top of the screen, indicating the current page (e.g. Sign up)
- Form/information message – actions for the user to complete (e.g. email input, and submit button)
- Navigation actions – for circular linking to avoid dead-end pages (e.g. Already registered? Sign in here.)
Sign in flow

The sign in flow is pretty simple:
- Sign in page – user submits their credentials
- Dashboard – user can see their tasks
Actionable elements on the screen:
- Email address input – user’s email address to sign in with
- Password input – user’s password to sign in with
- Show password button (eye within the input) – toggle between showing the password in asterisks, or the exact characters
- Submit button – submit with the entered email address
- Forgot password link – in case the user has an account, but cannot remember the password
- Sign up link – in case the user doesn’t have an account yet
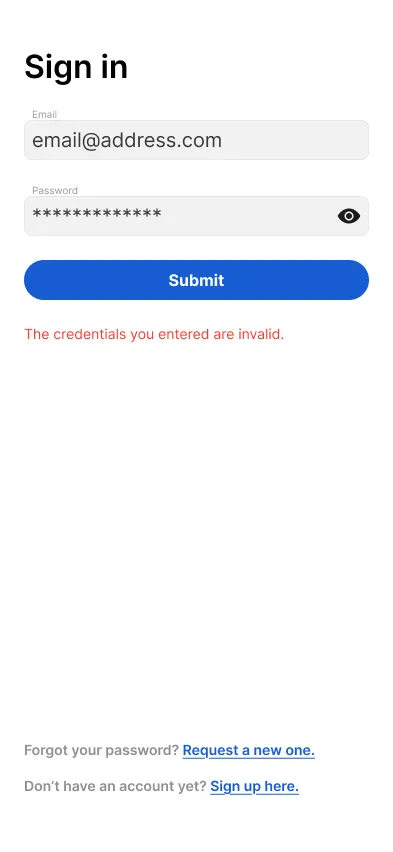
Input level validation:
- Email – required
- Password – required
Form level validation:
The email and password must match with what is in the database. Message: “The credentials you entered are invalid.”
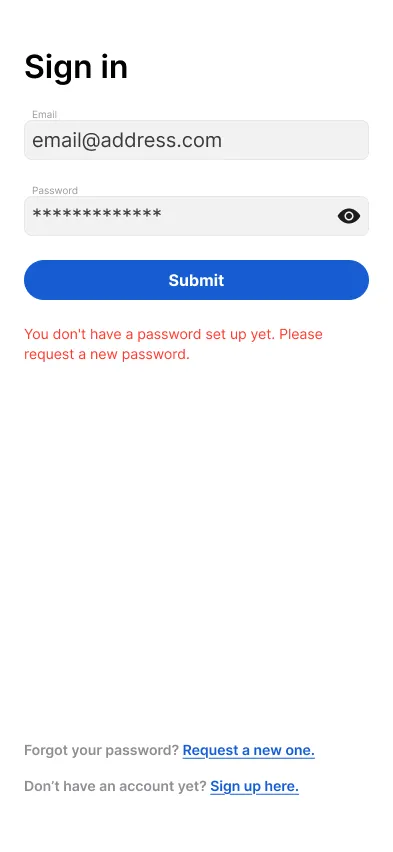
The registered, and validated email must have a password set up as well. Message: “You don't have a password set up yet. Please request a new password.”
Result upon submit success:
- The user is redirected to the authenticated view of the app, and can view their tasks.
Reset password flow
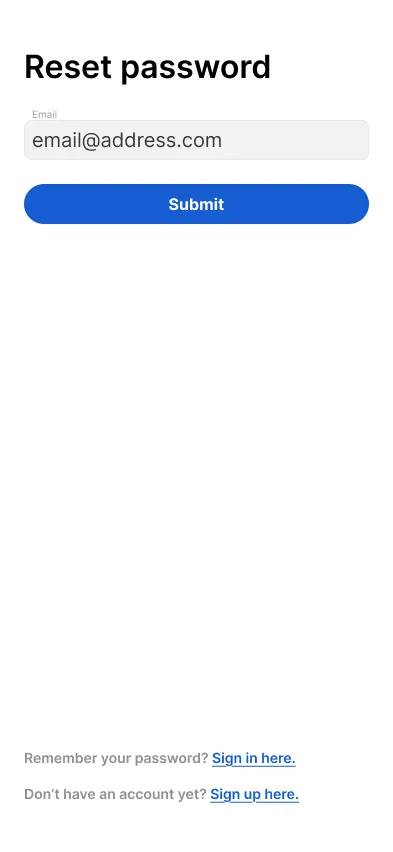
In case users need to set up a new password, they can do so following this flow:
- Sign in page – press reset password button
- Password reset page – user submits their registered email
- Password reset email sent – user presses reset password link
- Set password page – user enters and confirms their password
- Sign in page – user can use their new password to sign in
Actionable elements on the screen:
- Email address input – user’s email address they registered with
- Submit button – submit with the entered email address
- Sign in link – in case they remembered their password
- Sign up link – in case the user doesn’t have an account yet
Input level validation:
- Email – required
Result upon submit success:
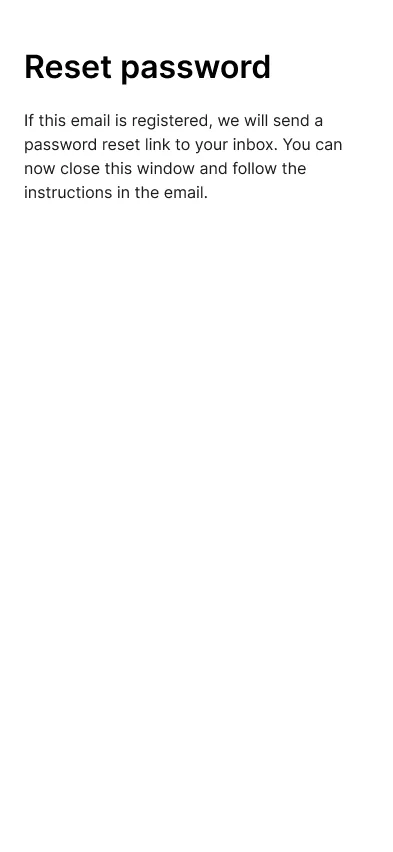
- User gets confirmation message: “If this email is registered, we will send a password reset link to your inbox. You can now close this window and follow the instructions in the email.”
- Password reset email is sent with password reset link.
The link:
- expires within 15 minutes
- can be only used once
If either of those are not met (opening the link too late, or trying to use it multiple times), we show a Set password failed screen, instructing the user to reset their password.
Sign up flow
- Sign in page – user doesn’t have an account, navigates to Sign up page
- Sign up page – user submits email address
- Verification email sent – user presses verification link
- Set password page – user enters and confirms their password
- Sign in page – user can use their credentials to sign in
Sign up
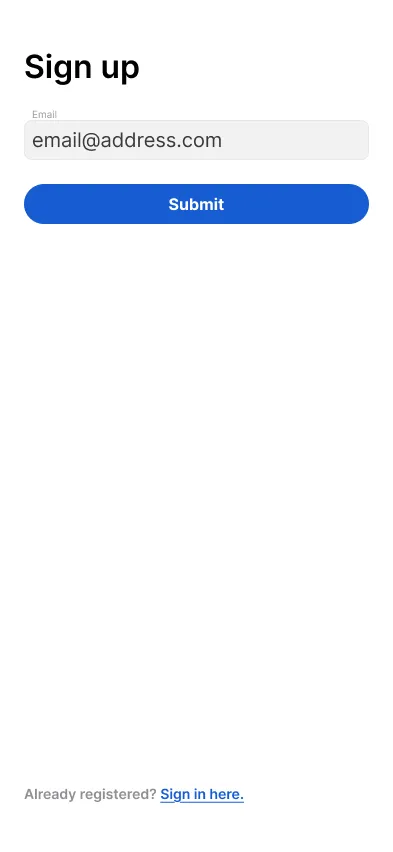
The sign up page is accessible from the Sign in page by pressing the link at the bottom: Don’t have an account yet? Sign up here.
Actionable elements on the screen:
- Email address input – user’s email address to sign up with
- Submit button – submit with the entered email address
- Sign in link – to be able to go back in case the email is already registered
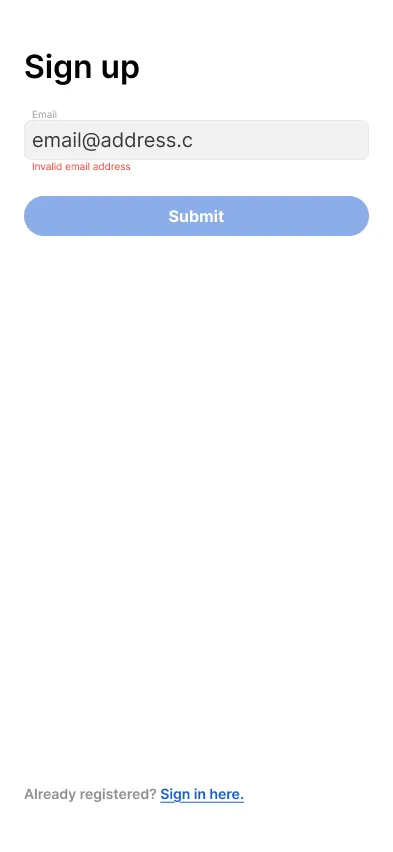
Input level validation:
Email – must be a valid email address. Message: “Invalid email address“
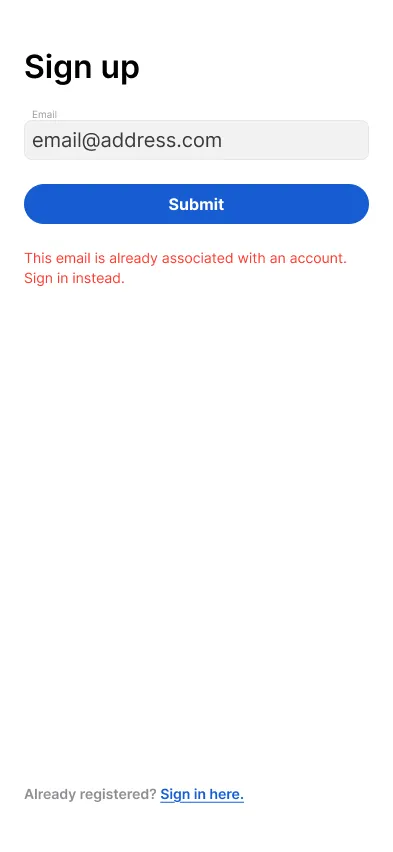
Form level validation:
The email cannot be already registered. Message: “This email is already associated with an account. Sign in instead.”
Result upon submit success:
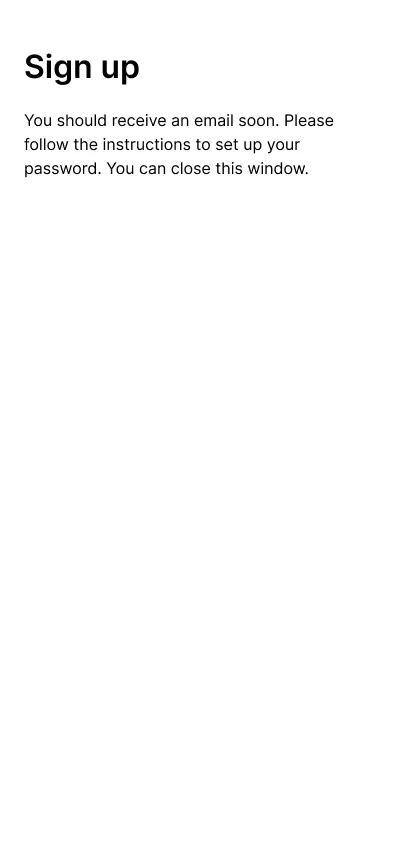
- User gets confirmation message: “You should receive an email soon. Please follow the instructions to set up your password. You can close this window.”
- Verification email is sent with verification link.
Verification
Email verification happens after signing up, and the goal is to make sure the user is really in possession of the entered email address. Without verifying the email address, the user cannot set a password, hence cannot log in.
The link:
- expires within 24 hours
- can be only used once
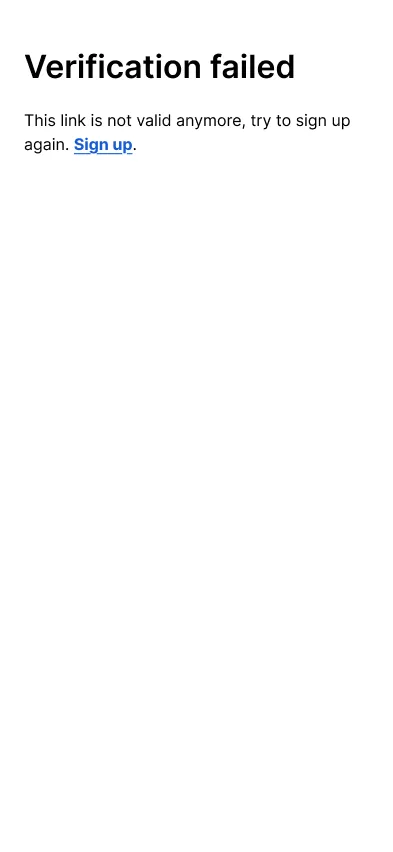
If either of those are not met (opening the link too late, or trying to use it multiple times), we show a Verification failed screen, instructing the user to sign up again.
If the link is valid, the user becomes verified in the system, and gets redirected to the Set password screen.
An edge case is where the user verifies their email using the verification link, but doesn’t finish setting up a password. In this case when they try to log in, they will receive a message asking them to set up a new password as stated above in the Sign in flow.
Set password
The set password screen is available when:
- using the verify email link as part of the sign up process
- using the reset password link on the sign in page
First, the link is validated to avoid the case of the user having to set a new password only to realise that the link is expired.
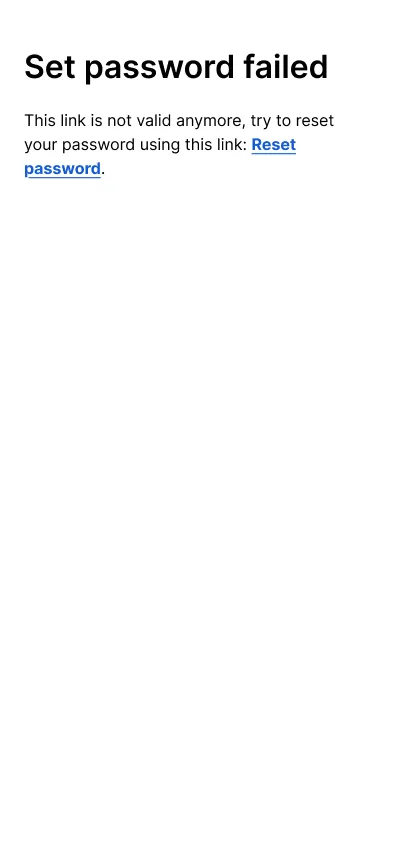
If it’s expired, we show the “Set password failed” screen, instructing the user to get a new link by resetting their password again.
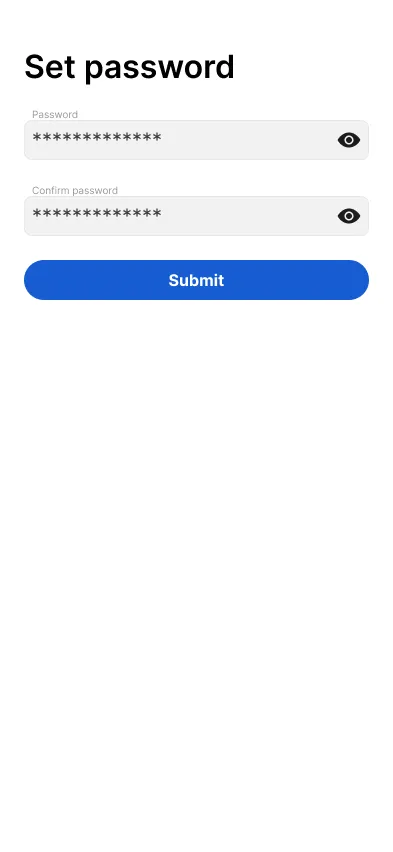
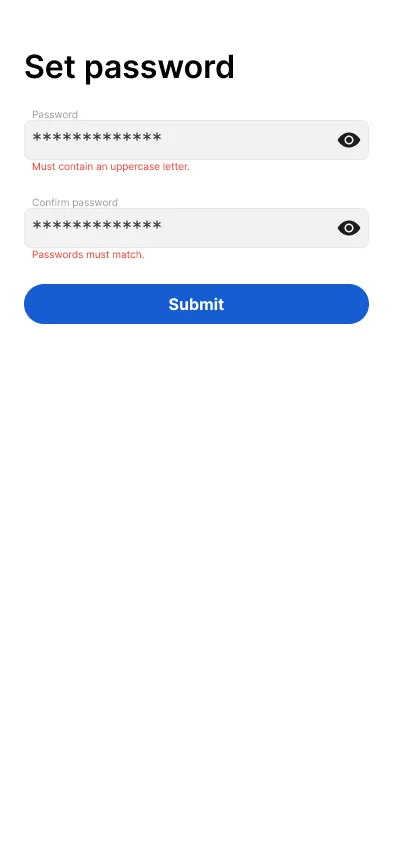
Actionable elements on the screen:
- Password input – user’s password to sign in with
- Show password button (eye within the input) – toggle between showing the password in asterisks, or the exact characters
- Confirm password input – asking the user to enter their password again to make sure there are no typos
- Submit button – submit the new password
Input level validation:
- Password
- Must be min 8 characters long.
- Must contain an uppercase letter.
- Must contain a lowercase letter.
- Must contain a number.
- Confirm password
- Passwords must match.
Form level validation:
- The password link is validated again in case it has been used since last validated, or expired since. If it became invalid, we show the “Set password failed” screen.
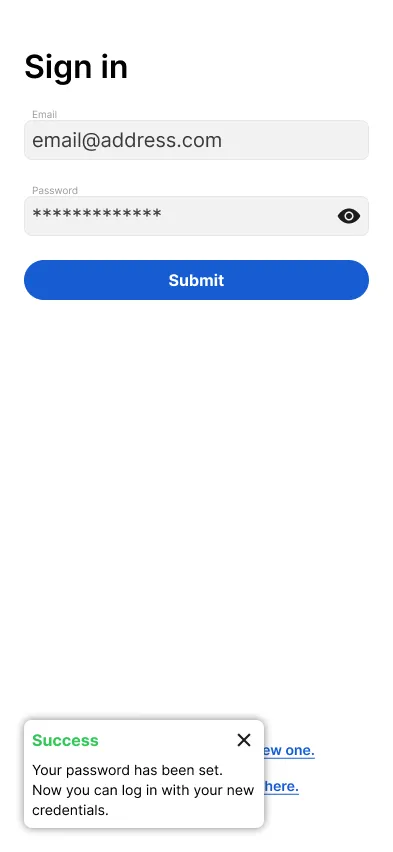
Result upon submit success:
- User gets redirected to the Sign in page where a confirmation message appears in a toast indicating that the password reset was successful, and they should be able to log in with the new credentials.
Sign out flow
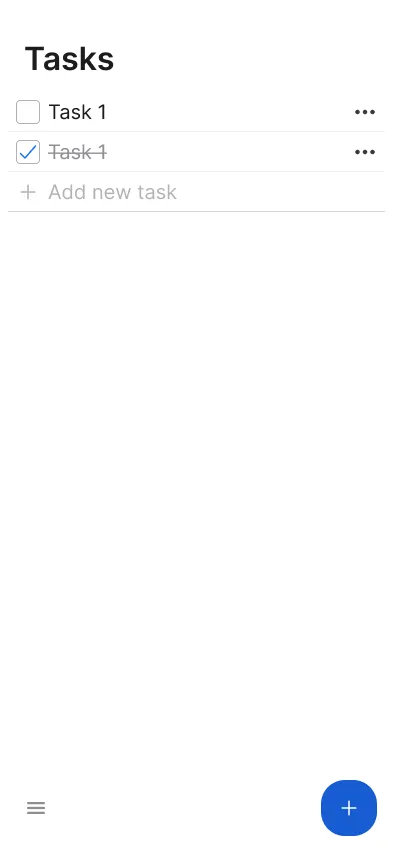
To make the users be able to sign out, we needed to extend the navigation of the main view in the dashboard. In the navigation bar we put a “burger” button to the bottom left corner, which opens a sidebar.
The sidebar is triggered by pressing the burger icon of the navigation bar, and is placed over the screen on an overlay.
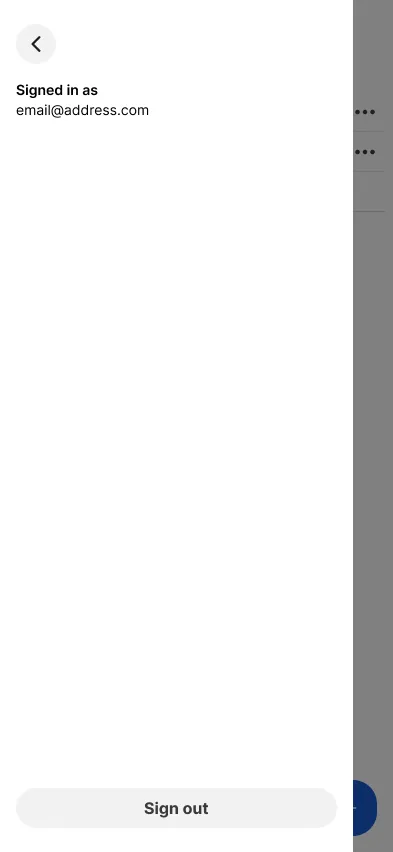
Elements:
- Back button – to close the sidebar
- Signed in as [email] – indicator of the email used
- Sign out button – delete the session
The sidebar can be closed by either the back button, or clicking anywhere outside the sidebar.
After the sign out button is pressed, the session is cleared, and the user is being redirected to the Sign in page.
Designs
Full designs can be found in the Figma file:
The prototype can be tried out using this Figma link.
You can see the tickets for this post in this ClickUp board
Next steps
Development has created a live, clickable prototype for the task management part of the app, so we will conduct user testing and gather feedback. Meanwhile, the development team is setting up the backend to implement authentication and replace our fake API with a real one.
This is what is upcoming:
In the next post we will walk you through step-by-step how to create a Fastify GraphQL API with a MongoDB database.